
Put photos, scans or receipts into one PDF
An expense form, a visa application or a landlord wants one PDF, and you have a pile of phone photos and scans. How to combine JPG, PNG and HEIC pictures into a single PDF in the order you want with KinoFlux Editor.
Nitiksh3 min readKinoFlux Editor
On this page
Expense reports, visa forms, rental applications and insurance claims all ask for the same thing: one PDF with all the pages. What you have is a set of phone photos of receipts, a scanned ID and a screenshot. Online "JPG to PDF" sites work, but those are exactly the documents you should not upload to a stranger's server.
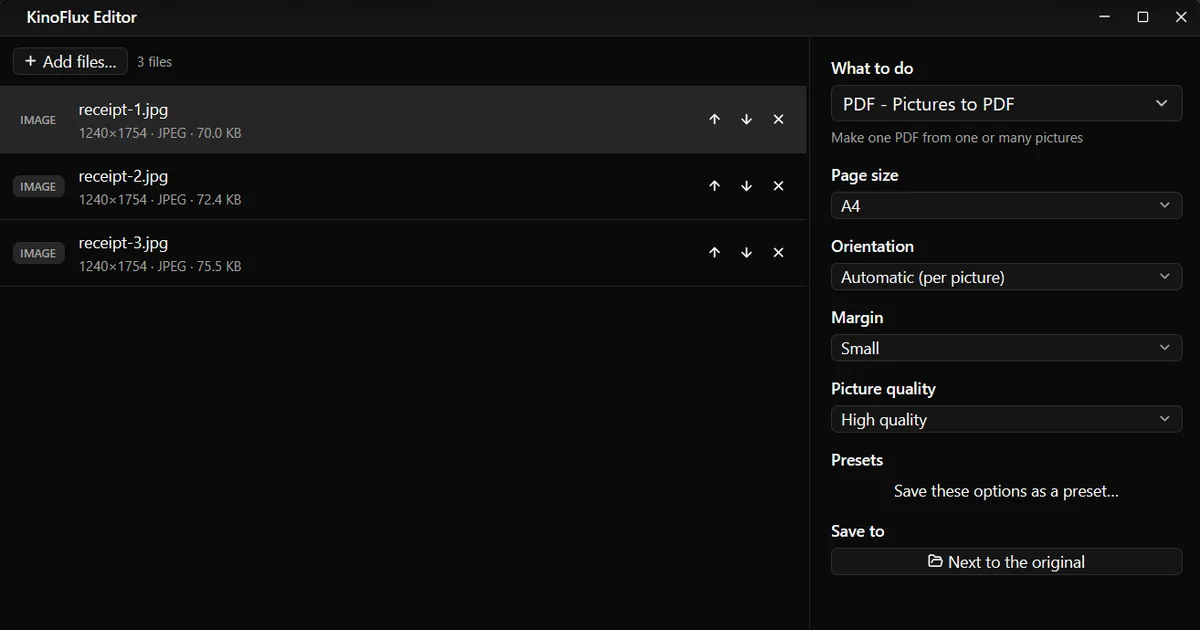
PDF - Pictures to PDF in KinoFlux Editor joins all the pictures in the list into one PDF on your own computer.
How to combine images into one PDF#
- Add the pictures. Drag them onto the KinoFlux Editor window.
- Pick the tool. Press Ctrl+K (Cmd+K on a Mac), type "pictures to pdf" and choose PDF - Pictures to PDF.
- Put them in order. Use the up and down arrows next to each file. The first file becomes page 1.
- Choose the page. A4 is the default; pick US Letter, or Same size as each picture for no page border at all.
- Start. Press Ctrl+Enter. One PDF is saved next to the first picture, named after it, for example
receipt-1_images.pdf.
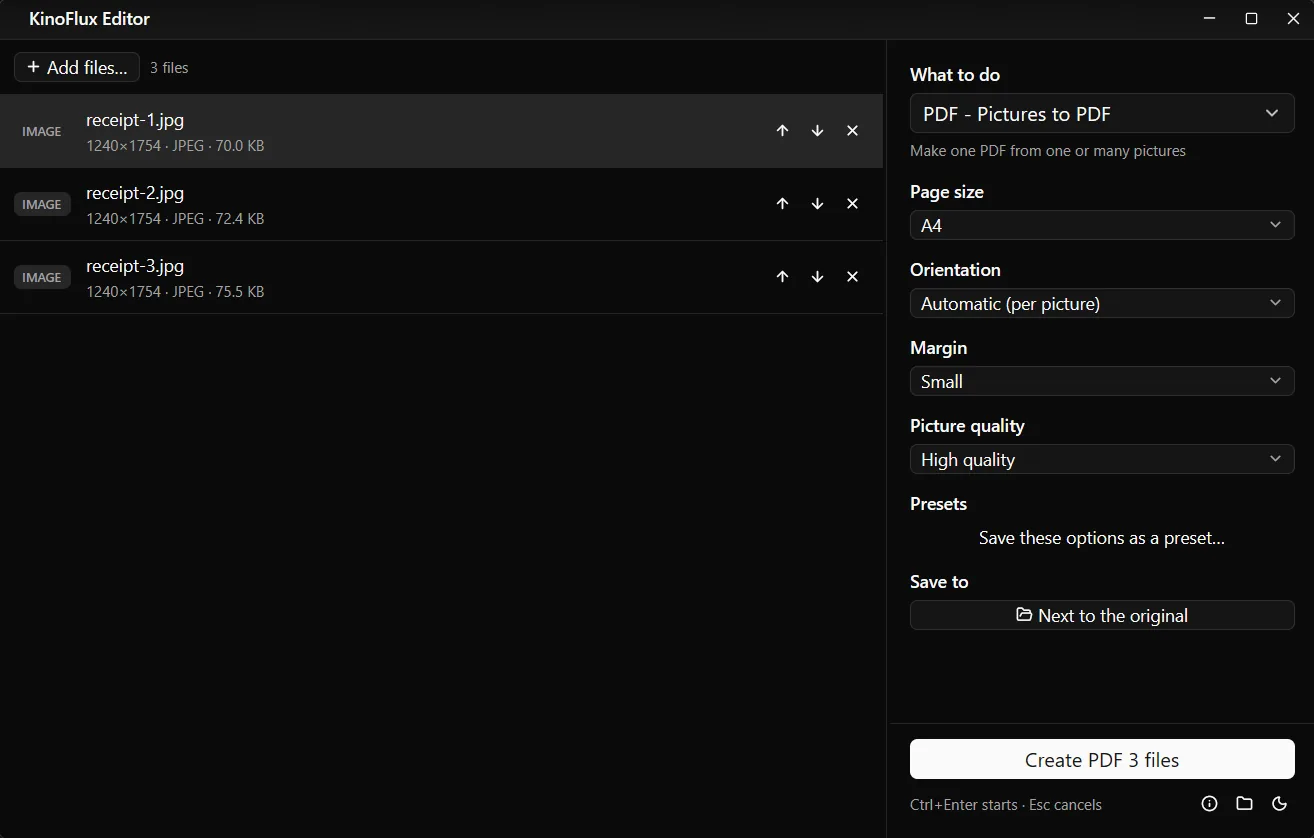
Result#
| Input | Output |
|---|---|
| receipt-1.jpg, receipt-2.jpg, receipt-3.jpg (1240 x 1754 each, 70 to 76 KB) | receipt-1_images.pdf, 3 A4 pages, 226 KB |
The receipts are demo scans made for these guides. All three rows in the list point to the same result, because they went into one file.
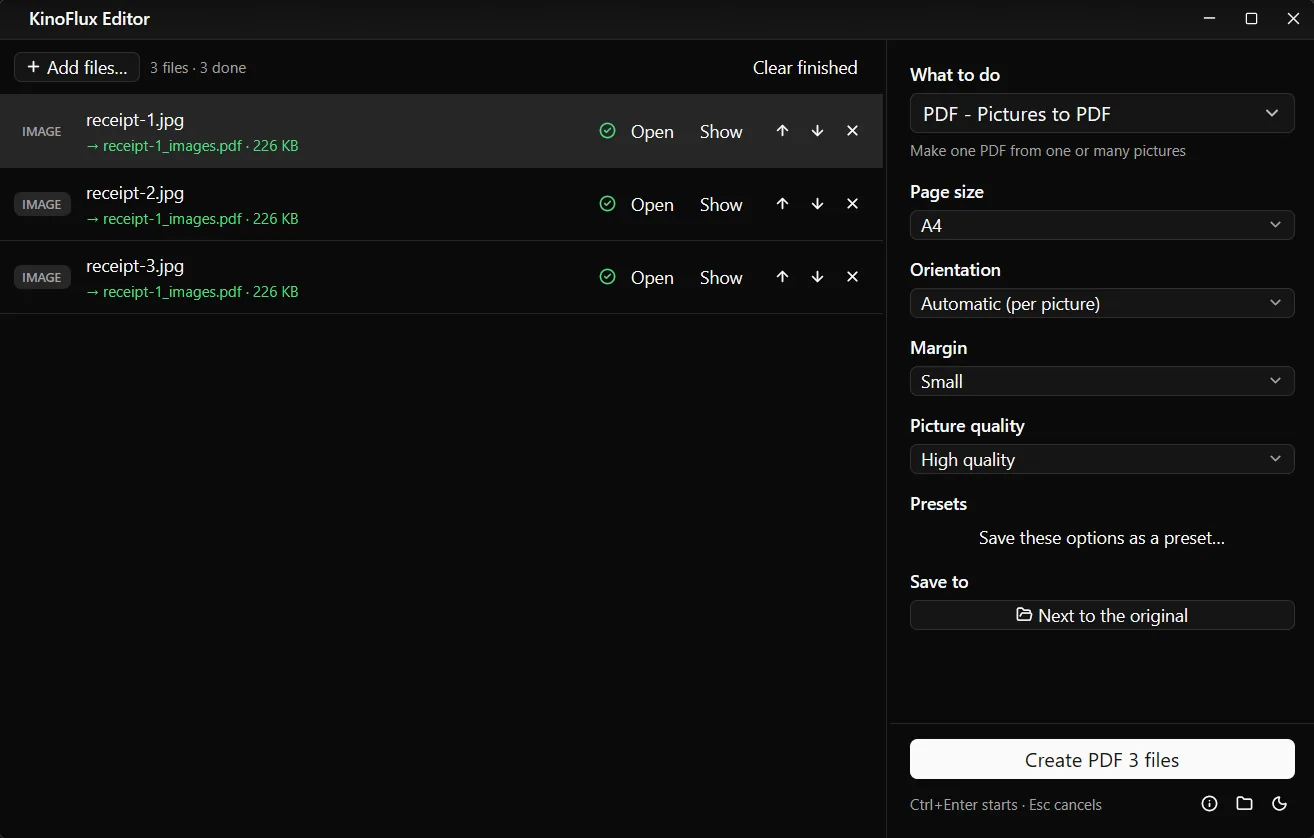
Options#
| Option | Choices | Default |
|---|---|---|
| Page size | A4, US Letter, Same size as each picture | A4 |
| Orientation (A4 and Letter) | Automatic (per picture), Portrait, Landscape | Automatic |
| Margin (A4 and Letter) | None, Small (about 10 mm), Medium (about 20 mm) | Small |
| Picture quality | High quality, Balanced, Smaller file | High quality |
With Automatic, a landscape photo gets a landscape page and a portrait photo a portrait page, in the same PDF. Pictures are scaled down to fit the page and centred on white; small pictures are not blown up.
The tool reads JPG, PNG, WebP, HEIC, HEIF, AVIF, BMP, TIFF, GIF, TGA, PSD, SVG and more, so iPhone photos can go in directly.
Limits#
- No text recognition. The result is pictures in a PDF. It is not searchable.
- 150 dpi pages. Fine for reading on screen and normal printing; not meant for high quality photo printing.
- No automatic cropping or straightening. A photo of a receipt on a table keeps the table. Crop first with Image - Crop / rotate.
- Transparent areas become white.
- Animated GIFs add only their first frame.
Related guides#
- Adding the new PDF to other PDFs: merge, split and compress PDFs.
- A page is upside down or in the wrong place: rearrange and rotate PDF pages.
- The other way round: convert a PDF to JPG.
- Locking it before sending: password protect a PDF.
All tools are on the KinoFlux Editor page.
Frequently asked questions
How do I change the page order?
The pages follow the order of the file list. Use the up and down arrows next to each picture before you start, or rename the files so they sort in order before adding them.
Can I make one PDF per picture instead?
Add one picture at a time, or use Image - Convert / compress with Format set to PDF (one page), which makes a separate PDF for every picture.
Is the text in the PDF searchable?
No. The pages are pictures. There is no text recognition (OCR), so you cannot search or copy the text.
My phone photos are sideways in the PDF. Why?
They should not be: each picture is turned upright using the phone's rotation flag first. If a scan was taken sideways on purpose, rotate it with Image - Crop / rotate first, or fix the page later with PDF - Rotate pages.
How big will the PDF be?
Pages are made at 150 dpi, so large phone photos are scaled down to fit the page, which keeps the file small. Three receipt scans made a 226 KB PDF. Choose Smaller file under Picture quality for email limits.
- jpg to pdf
- scans
- receipts
- pdf tools