
Convert and resize a batch of images in one go, offline
Use KinoFlux Editor 0.1.2 to turn JPEG and PNG files into WebP or another format, cap the longest side, and strip camera metadata for many pictures at once. Includes real before and after sizes.
Nitiksh3 min readKinoFlux Editor
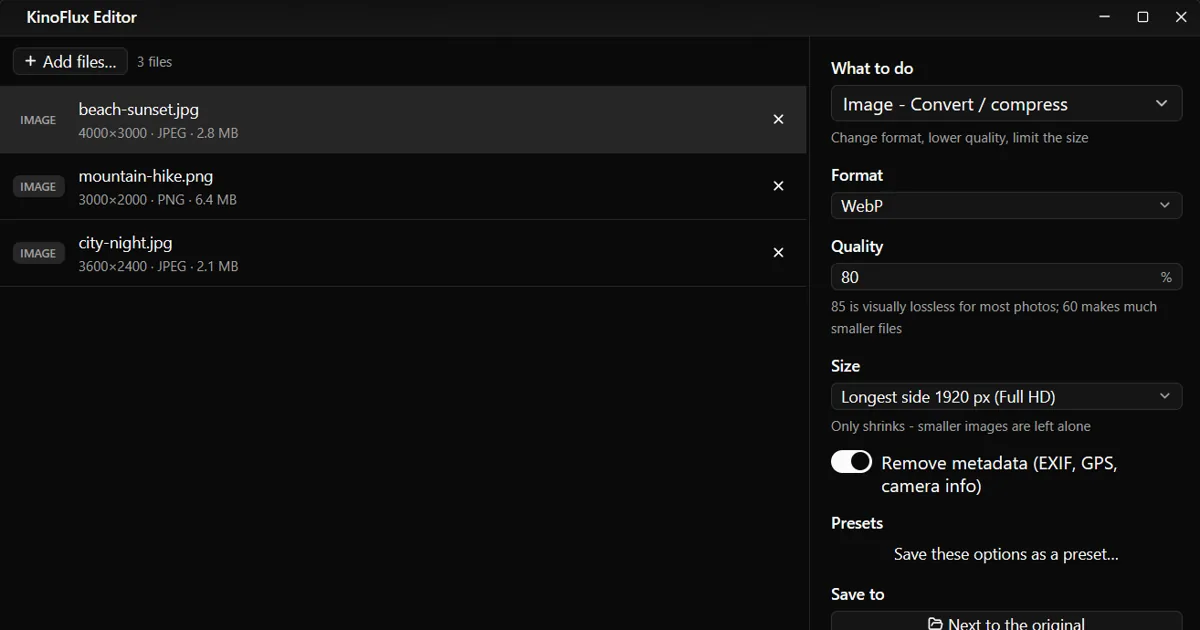
Phone photos are large, websites want small files, and nobody wants to upload family pictures to a converter site to fix that. KinoFlux Editor 0.1.2 has seven image tools. This post uses the main one, Image - Convert / compress, on a batch of three pictures, and then points to the others.
Steps#
- Select the pictures in a folder and drop them on the window, or press Ctrl+O. You can mix formats in one batch.
- For pictures the panel preselects Image - Convert / compress.
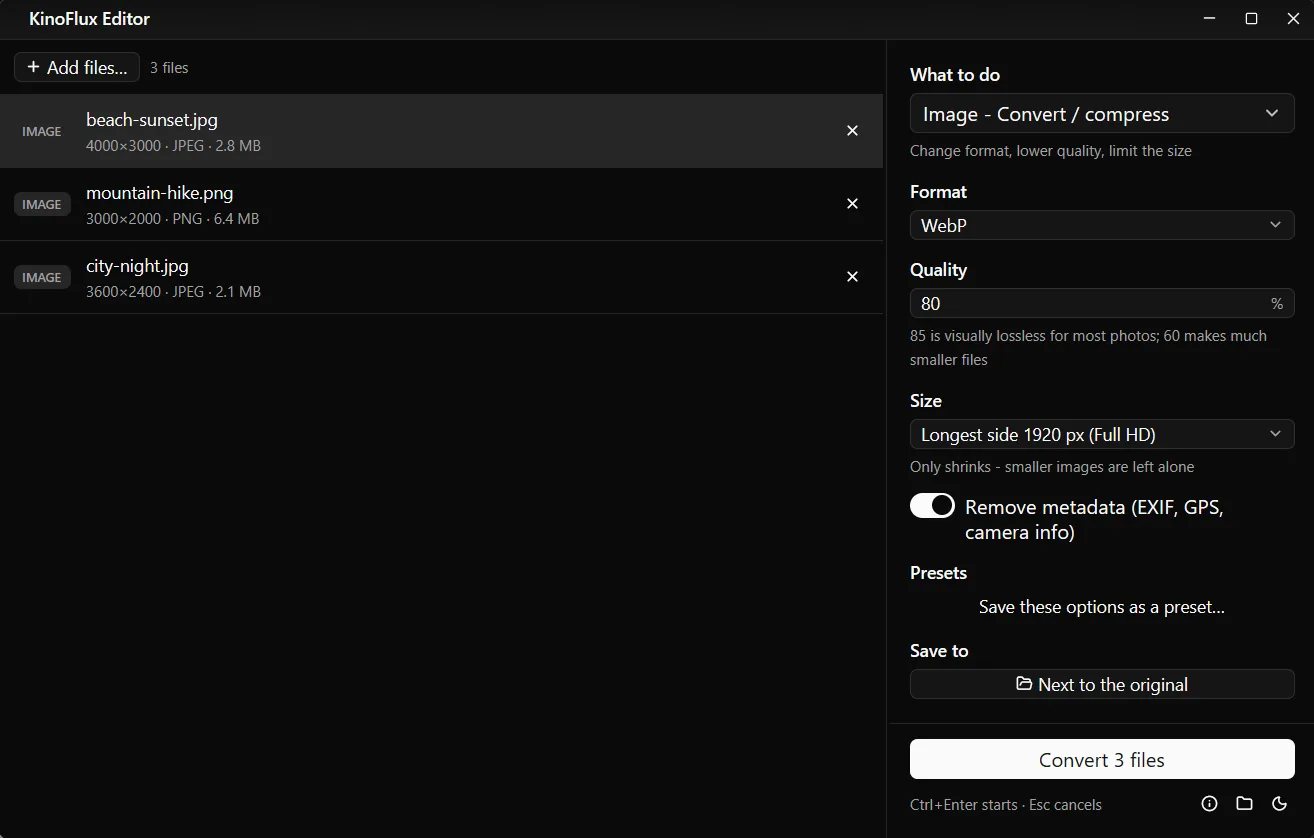
- Choose a Format, a Quality and a Size.
- Leave Remove metadata on if you plan to share the files.
- Press Ctrl+Enter. Images are processed four at a time.
The options#
- Format. JPEG, PNG, WebP, AVIF, TIFF, BMP, GIF, ICO (up to 256 px), PDF (one page), PSD, TGA or JPEG 2000. The default is JPEG.
- Quality. 1 to 100 percent, default 85. It applies to JPEG, WebP, AVIF and JPEG 2000. The panel's own hint says 85 is visually lossless for most photos and 60 makes much smaller files.
- Size. Keep the original size, or limit the longest side to 3840, 2560, 1920, 1280, 1024 or 800 pixels. The cap only shrinks: smaller pictures are left alone.
- Remove metadata. On by default. It removes EXIF, GPS and camera information, so a photo you share does not carry the location it was taken at.
Input formats include JPEG, PNG, WebP, BMP, TIFF, GIF, ICO, AVIF, JPEG 2000, TGA, PSD, SVG, and HEIC/HEIF. HEIC can be read but not written, so convert it to JPEG or WebP. SVG is accepted as input, but there is no SVG output.
Real results#
My three demo pictures are synthetic, so they have smooth areas that compress extremely well. The percentages below are far larger than you will see on real photographs. Use them to check the steps, not to predict your own savings.
| File | Original | Result (WebP, quality 80, 1920 px) |
|---|---|---|
| beach-sunset.jpg, 4000×3000 | 2,977,694 bytes | 22,736 bytes |
| mountain-hike.png, 3000×2000 | 6,728,848 bytes | 14,478 bytes |
| city-night.jpg, 3600×2400 | 2,192,860 bytes | 52,796 bytes |
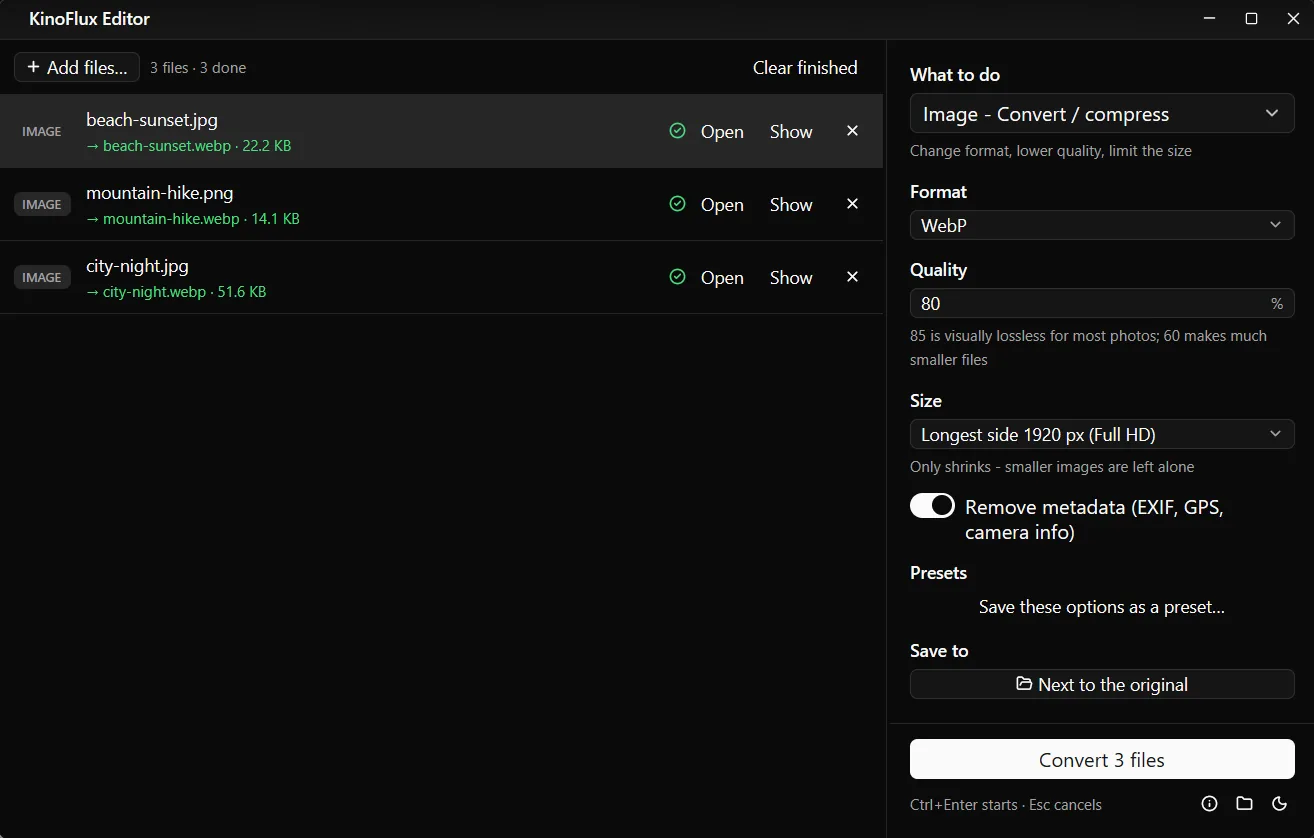
Each output sits next to its source with the new extension, for example beach-sunset.webp. The originals are not touched, and a name that already exists gets " (2)" added.
The other image tools#
Convert / compress covers most needs. Five more tools handle specific jobs:
- Image - Compress has five simple levels, from Maximum quality (95) to Tiny (30), and an option to keep each file's format or switch to JPEG or WebP. It is the quick choice when you just want "smaller".
- Image - Resize scales by percentage, width, height, a fitting box, a filling box or an exact size. "Never enlarge" is on by default.
- Image - Resize to a preset has ready-made sizes: Instagram square and portrait, Story or TikTok, YouTube thumbnail, X post, Facebook cover, LinkedIn banner, Full HD, 4K, a 400×400 profile picture, a 600×600 passport photo and a 512×512 app icon. It either fills the frame by cropping or fits inside with borders.
- Image - Crop / rotate and Image - Add a watermark do what the names say.
- Image - Remove metadata strips the hidden data and changes nothing else.
Pictures can also become a single PDF with the PDF tool "Pictures to PDF". The PDF post covers the other PDF tools.
Good habits for batches#
- Test the settings on one or two files first and look at the result before you run a folder of hundreds.
- Keep the originals. Since KinoFlux never overwrites, that is the default, but do not delete the source files until you have checked the outputs.
- Save a combination you reuse, such as "Web 1920 WebP 80", as a preset.
- Quality 80 to 85 is a sensible starting point. Lower it only if you need the file smaller and have looked at the picture.
The conversion is done by ImageMagick 7, which ships inside the app, and your pictures stay on your computer. See the introduction for the whole tool list, the privacy post for what is stored, and the product page or v0.1.2 release for the download.
- image converter
- webp
- batch resize
- windows